CORE! How We Replaced Rotten Balsa Core in Our Boat Deck
(And What We Learned the Hard Way)

Replacing a rotten balsa core in a boat deck isn’t exactly a fun weekend project, but when your deck starts feeling like a trampoline, you’ve got work to do. This is not a perfect step-by-step guide—it’s more of a “here’s what we did, what worked, what didn’t, and what we wish we had known before we started.” Consider it a survival guide to deck replacement.

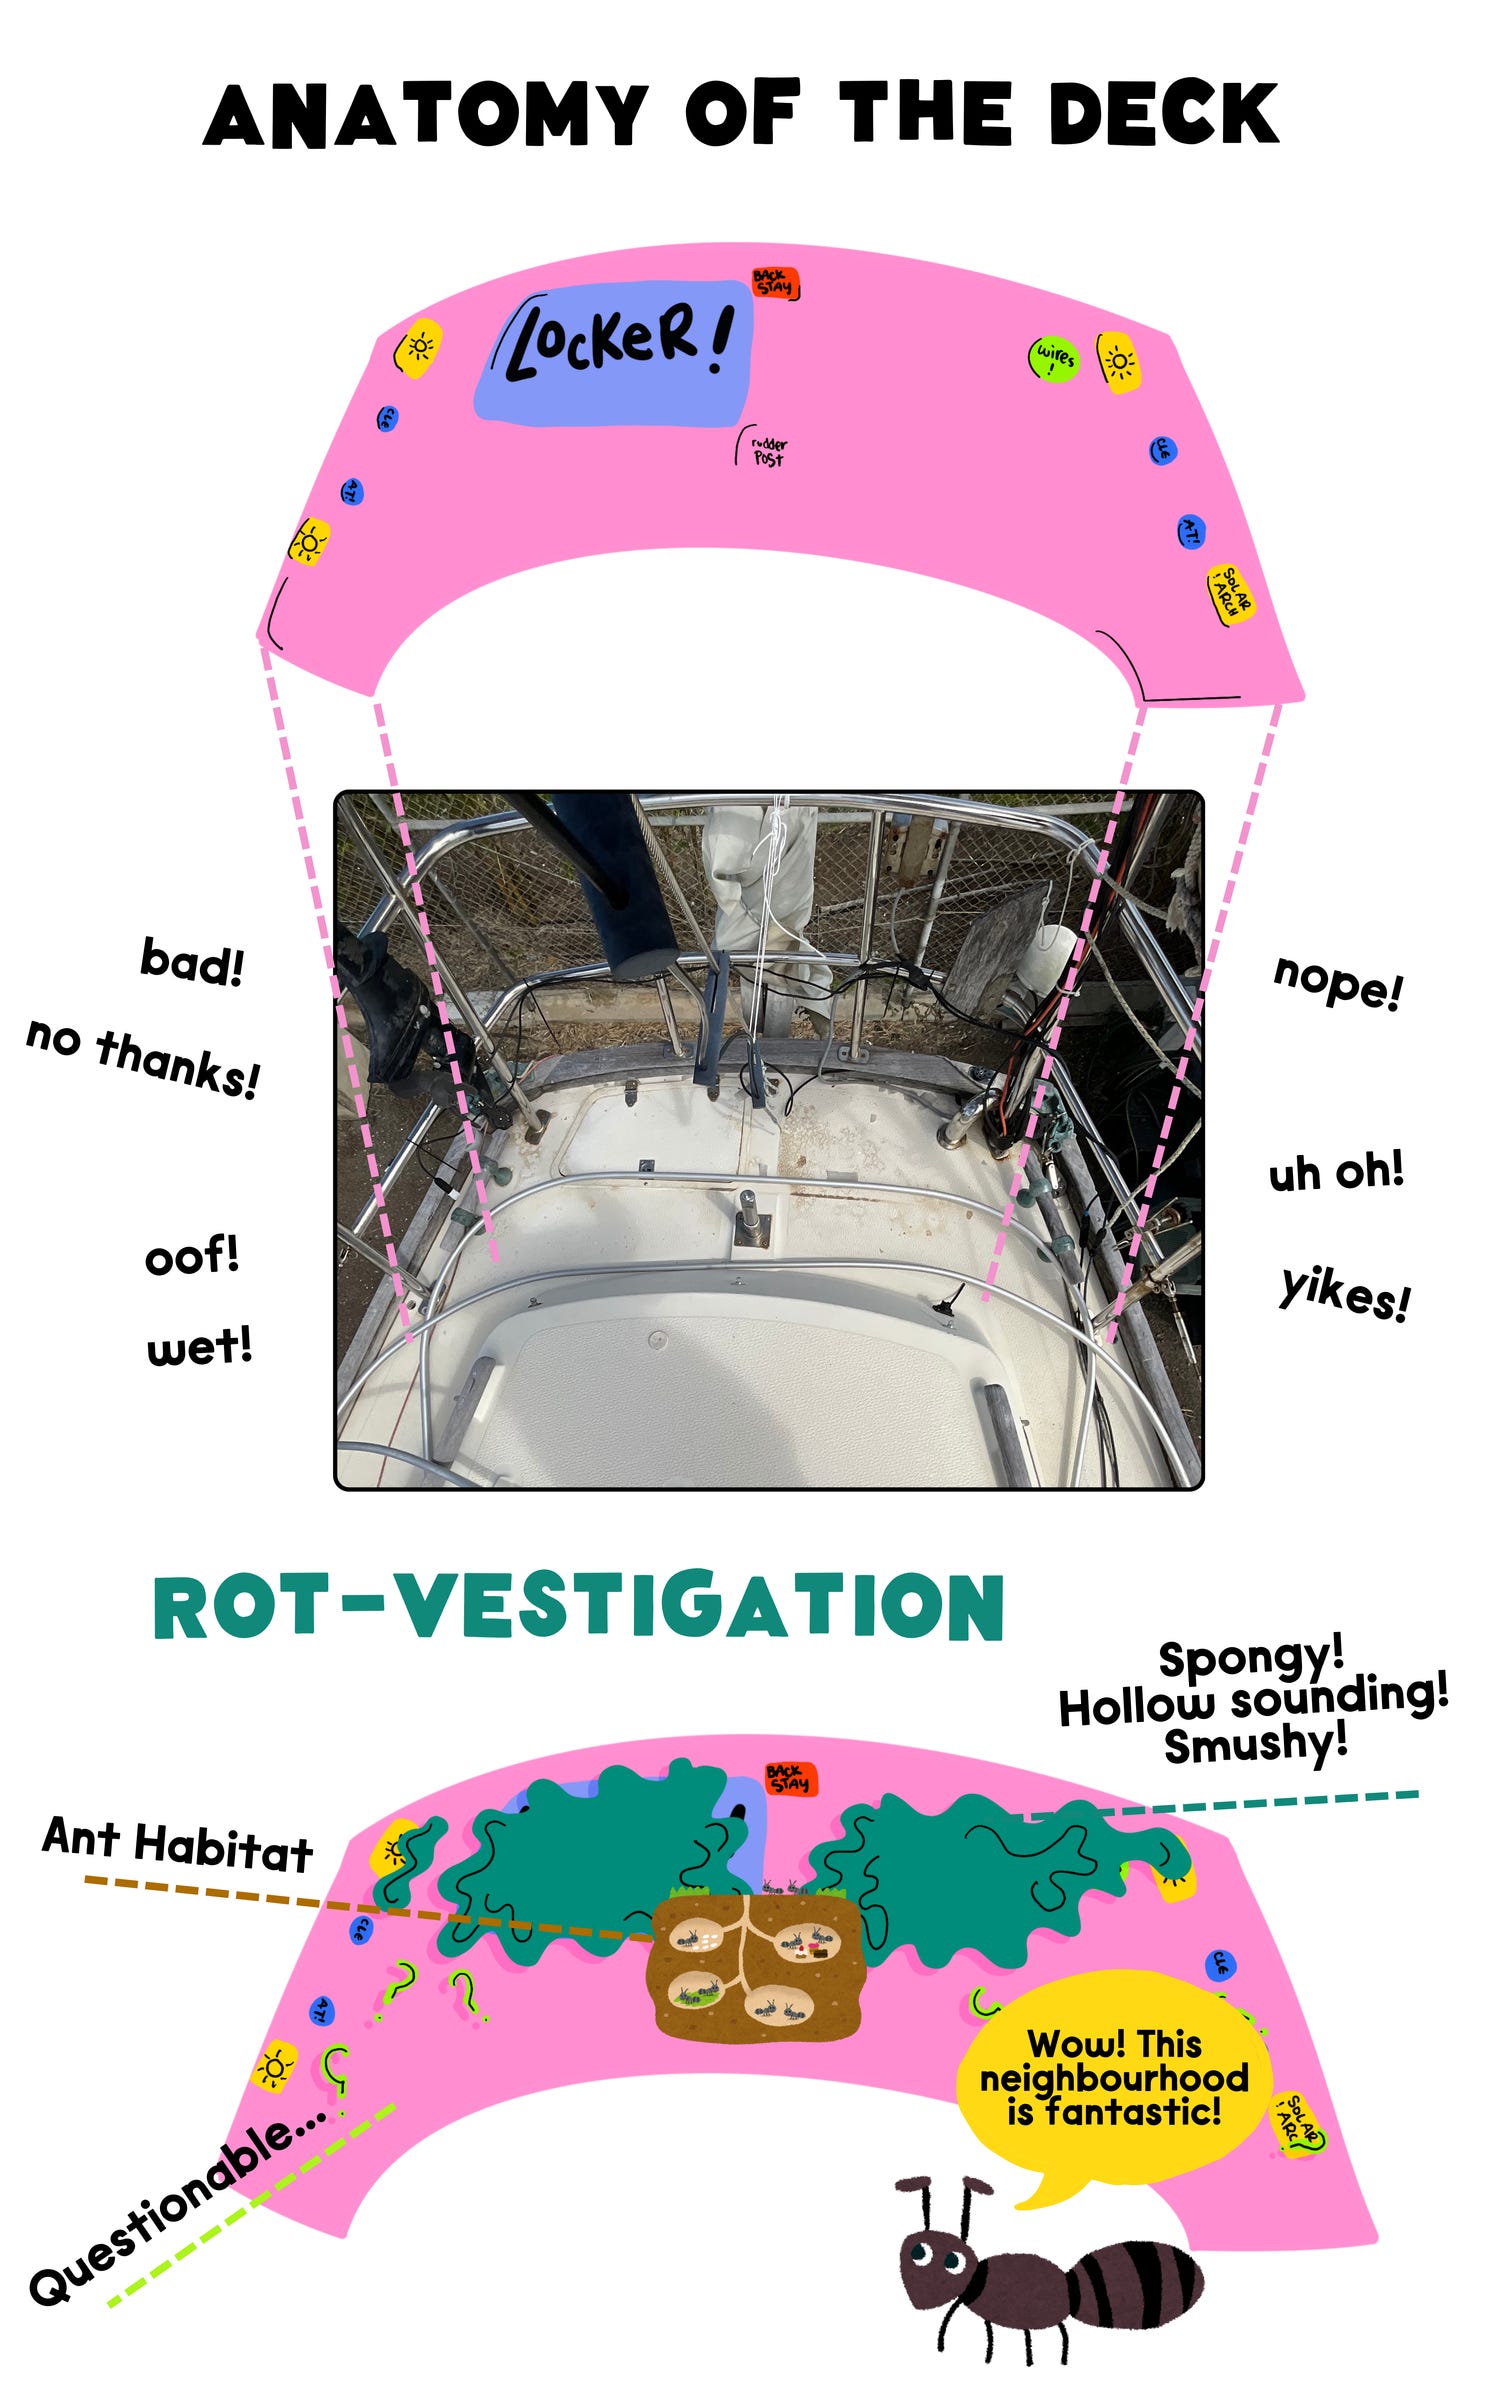
The Problem: Our Boat Was Slowly Melting From The Inside Out
Our boat had a solar arch that was installed in the worst possible way—screws straight into unsealed balsa core, no backing plates, no sealant, bad news all around. Water seeped in, soaked the core, and eventually turned it into a mushy slush. To make matters worse, a poorly designed deck locker also allowed water to pool and saturate the core even further. Bonus - turns out ants love to live in rotten balsa. They made a big huge nest throughout the aft deck core.
We knew it was bad. Tapping it with a mallet produced a dull thud instead of the expected sharp sound. Ants were crawling out of the deck hardware. No thank you.
Our Brilliant (And Failed) First Plan
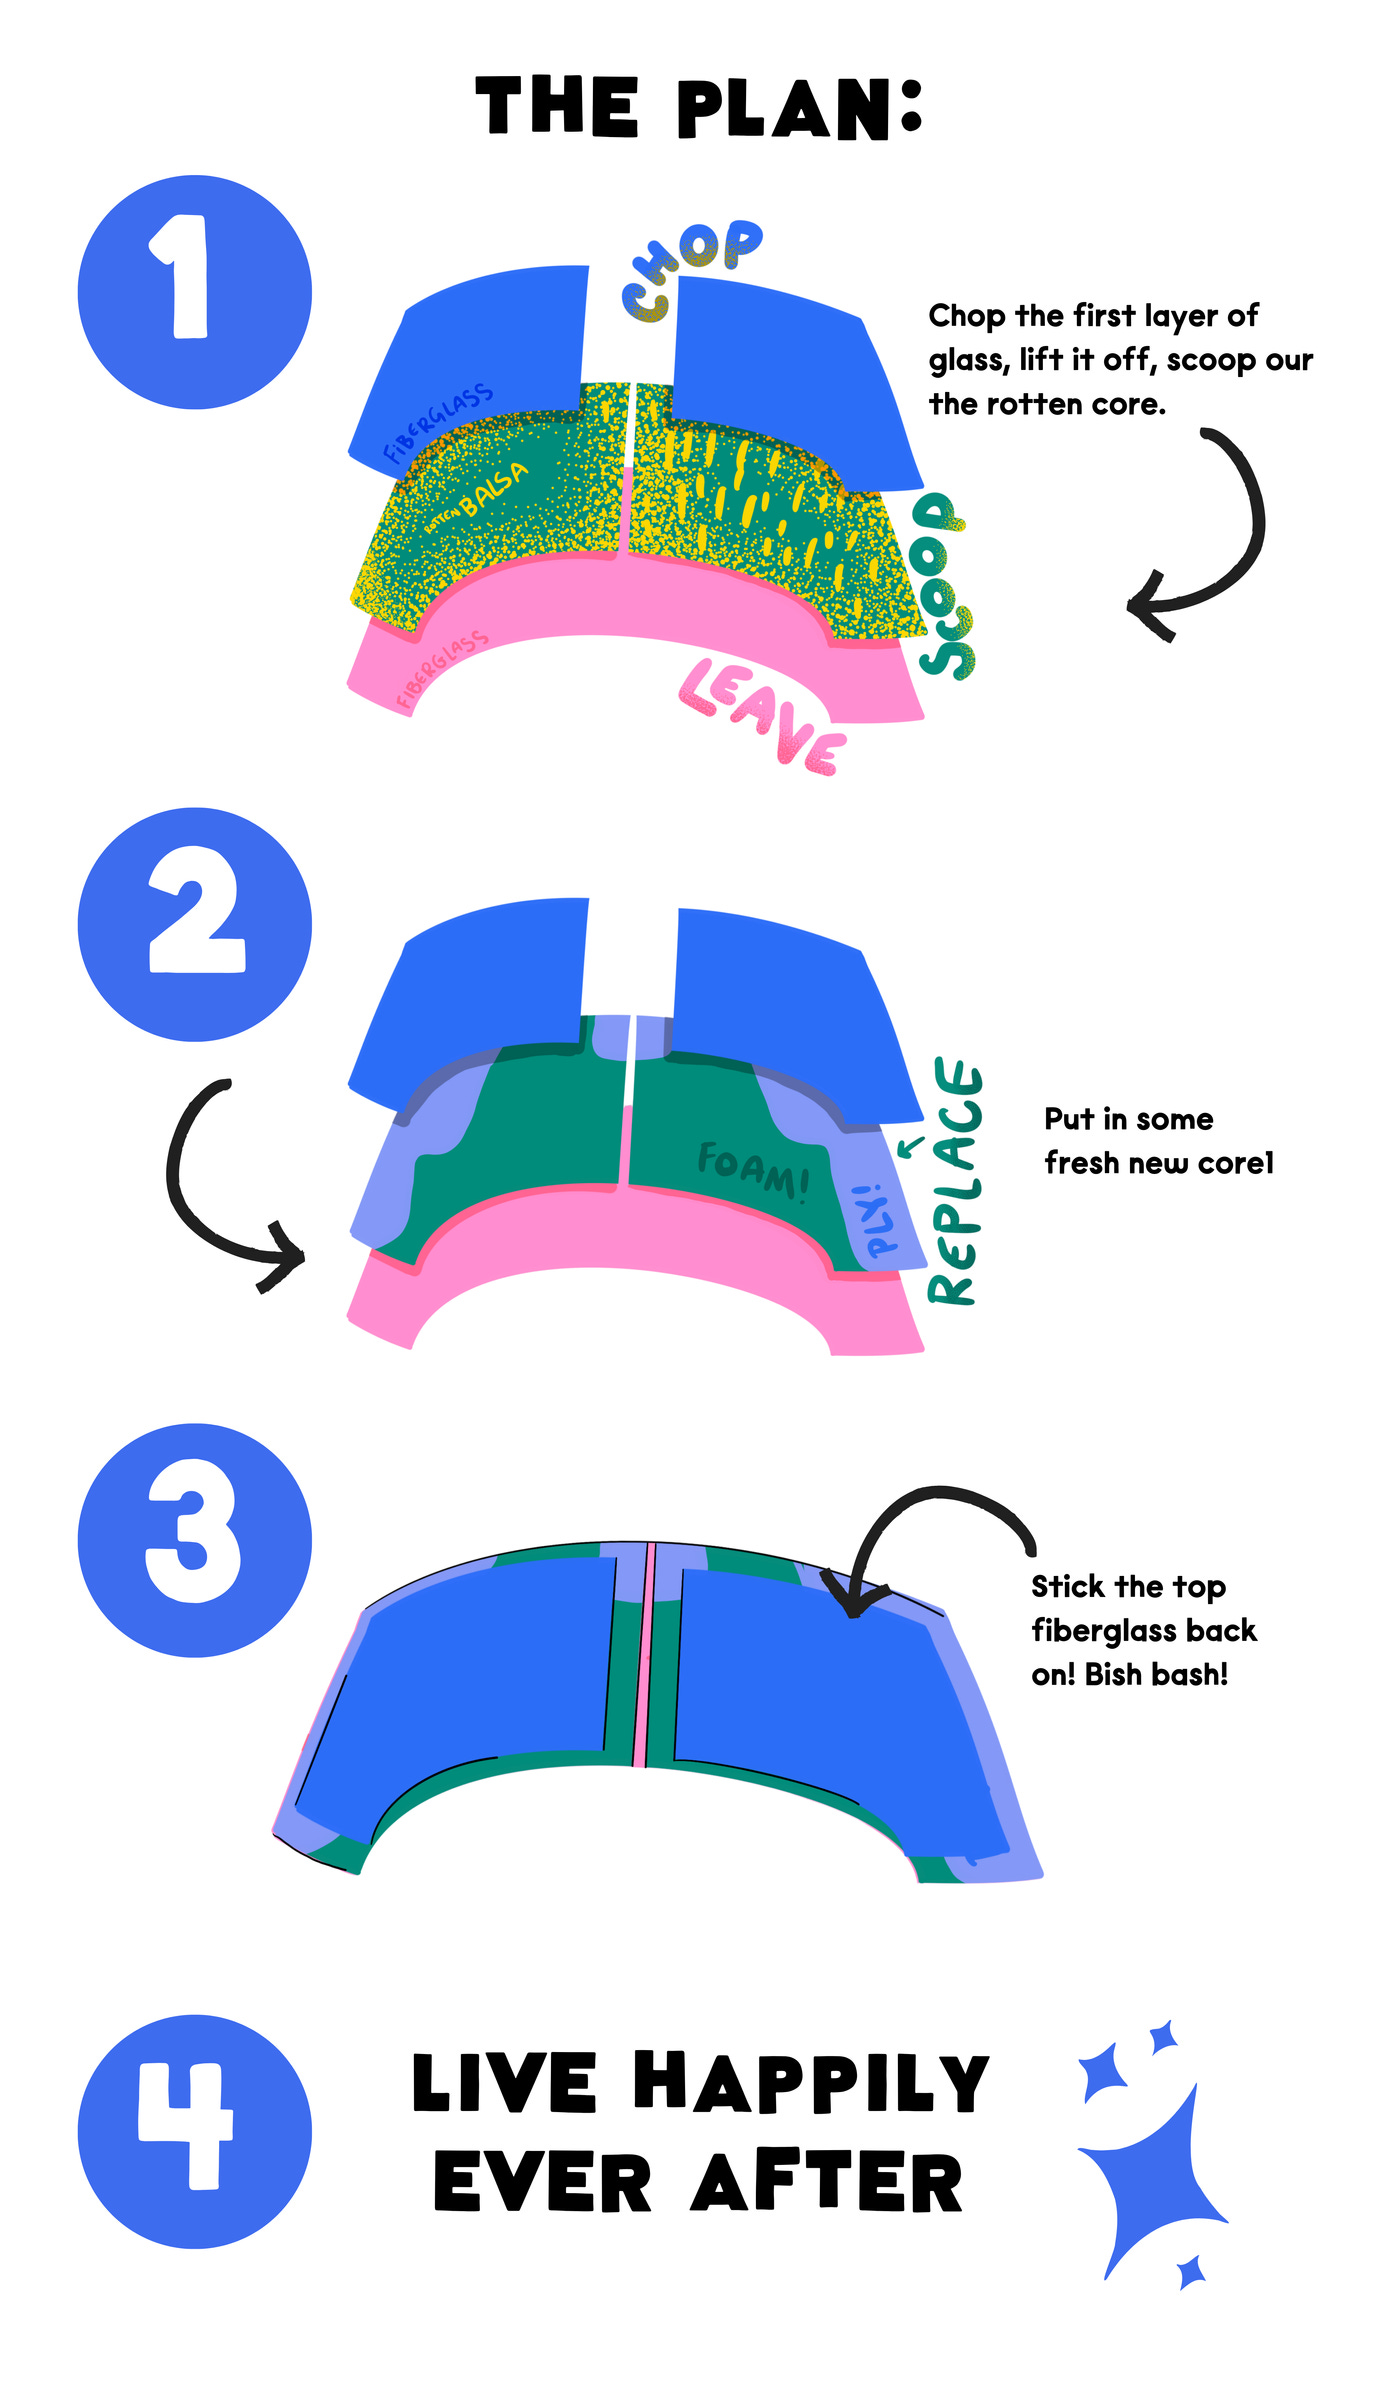
We started out thinking we could just follow Don Casey’s classic method from Sailboat Hull & Deck Repair:
Remove the fiberglass top layer.
Scoop out the rotten core.
Replace it with new core material.
Reattach the fiberglass top.
Live happily ever after
(He puts it far more elegantly, you should really just read that instead of this…)
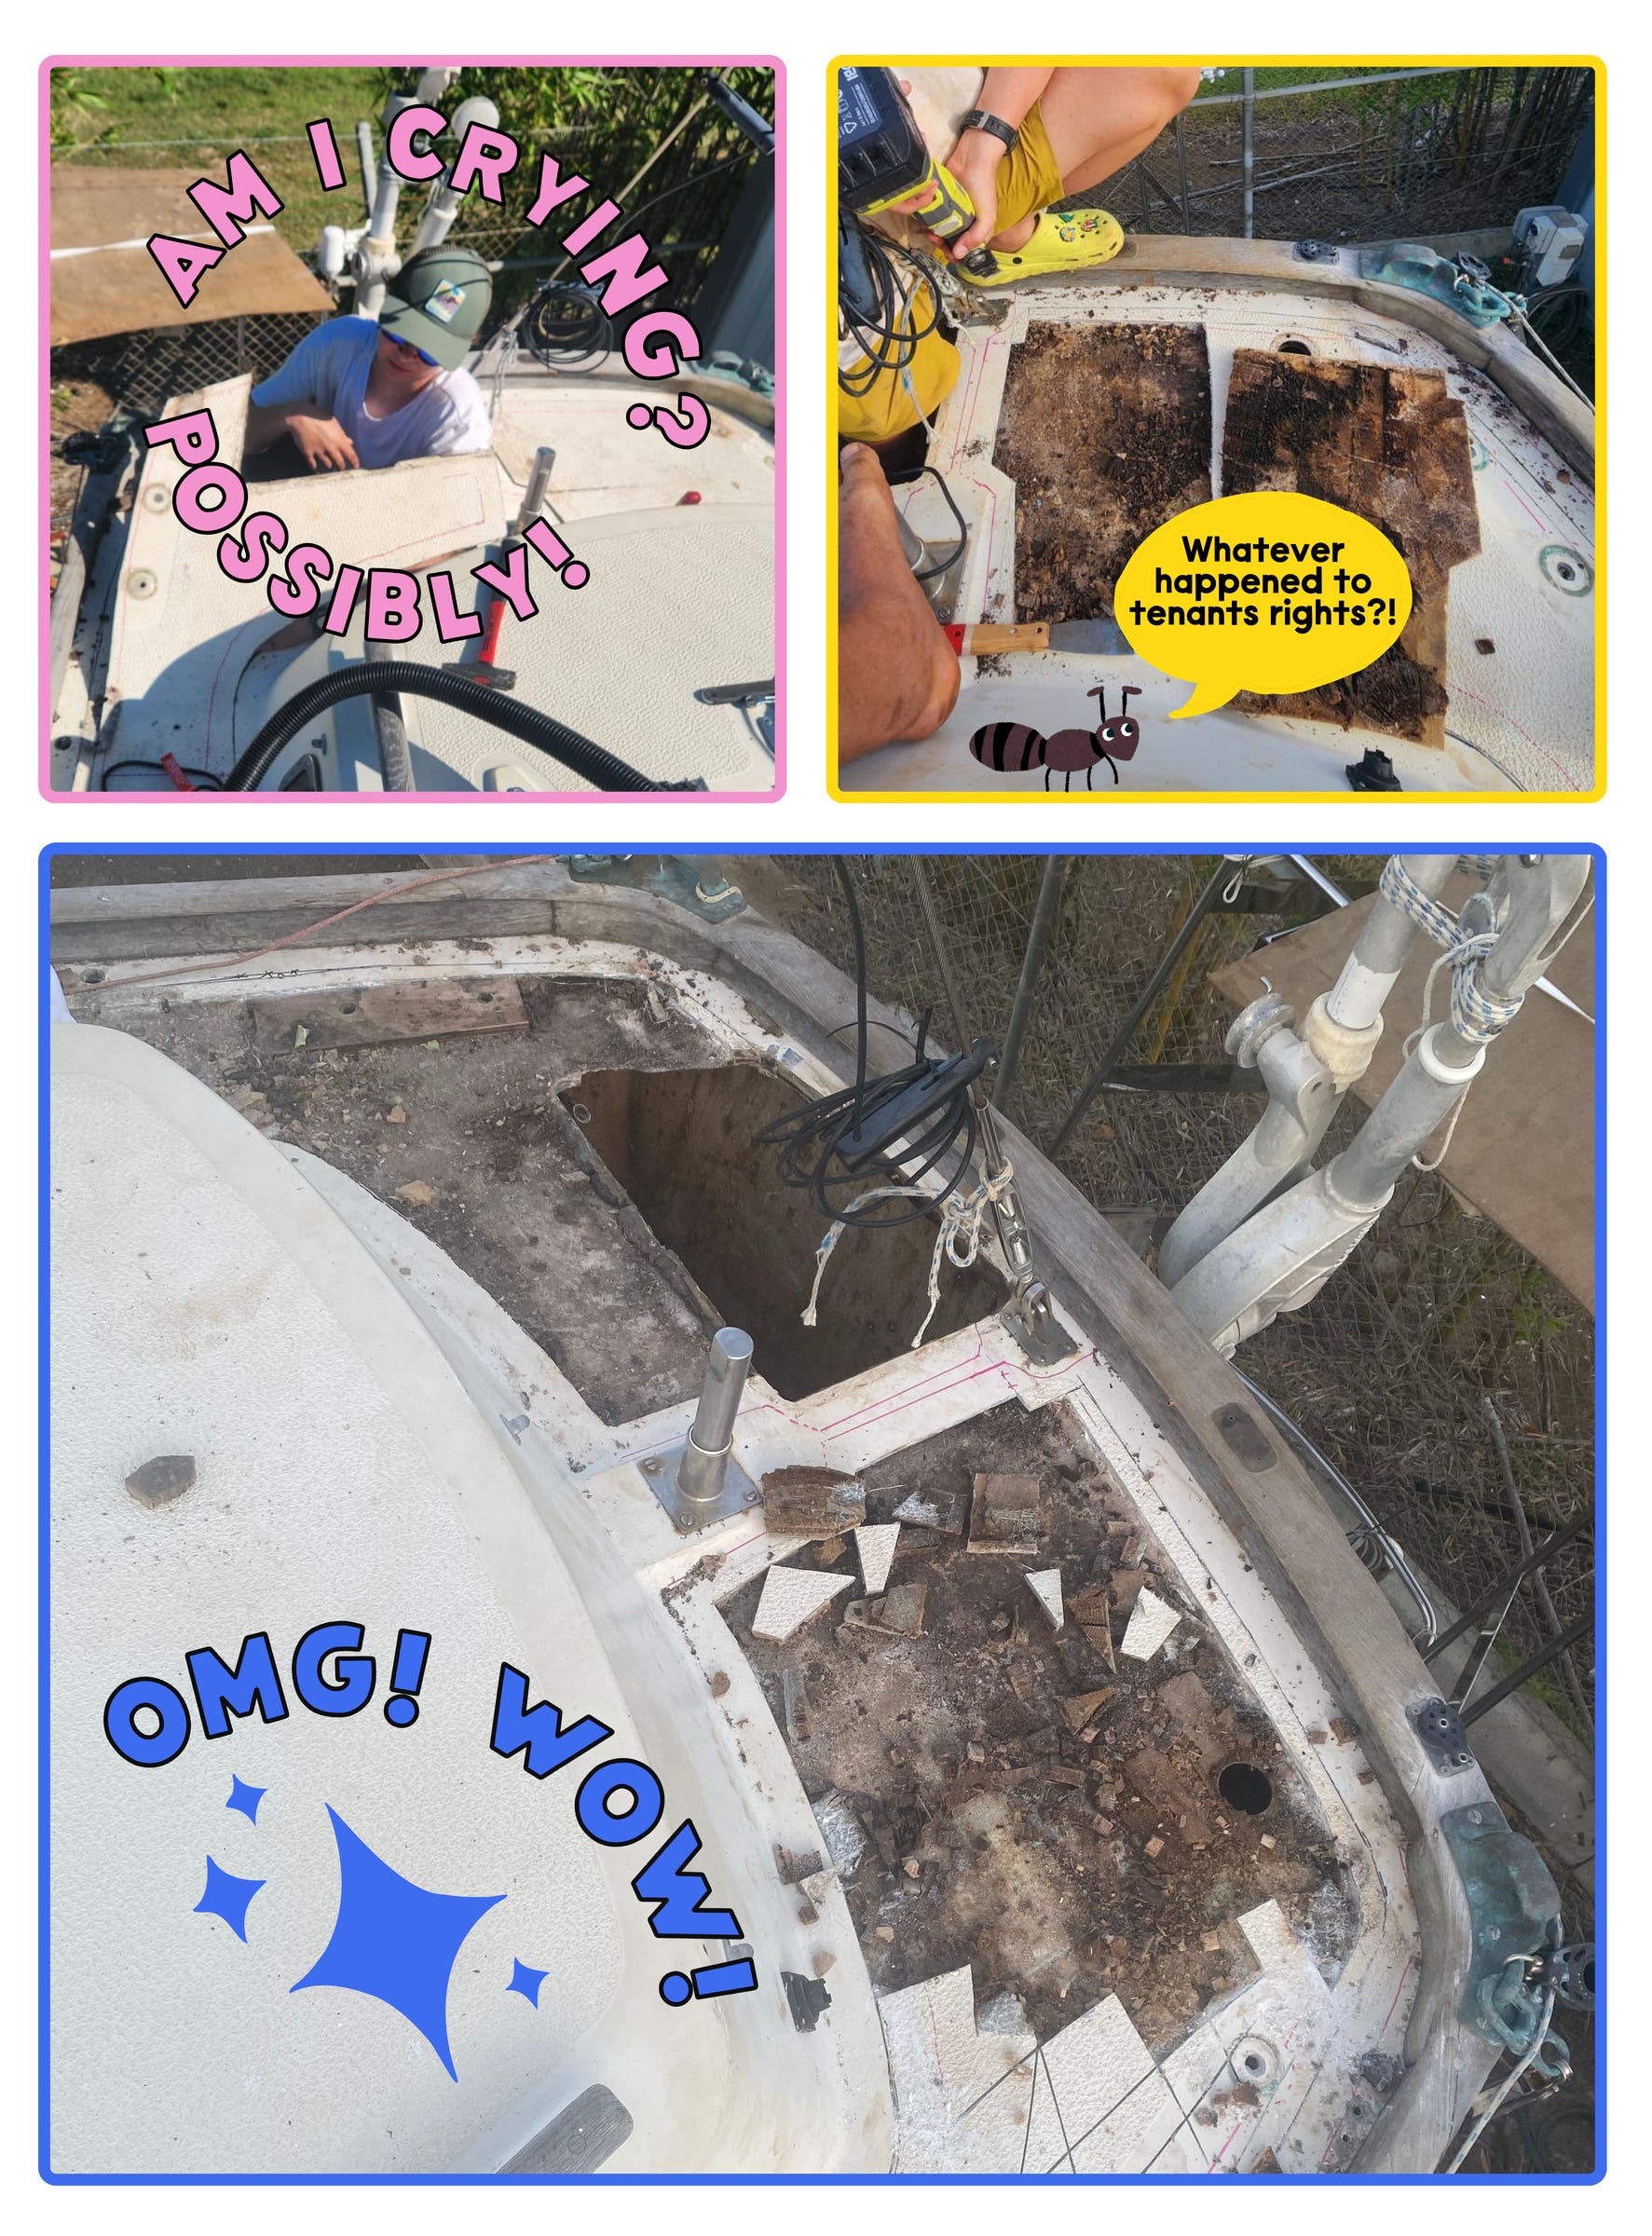
What went wrong:
The fiberglass top didn’t come off cleanly. Parts came off ezpz, others hung on for dear life.
The balsa core wasn’t evenly rotten, which made removal extra annoying.
Heat guns and chisels didn’t work as promised, and we spent hours just hacking away at stubborn patches of a fibreglass damp wood sandwich.
New Plan: Just Cut It All Out
Since delicately removing the top layer was a no-go, we switched to brute force. We cut the deck into manageable sections, pried everything out. Don Casey’s method involves ramping the edges of the top fiberglass layers and adding fiberglass on top to strengthen the cut area. Unfortunately for us, more cuts = more ramps. We decided it would look pretty bad to have a patchwork of new and old fibreglass and had to fully commit to rebuilding the top layer from scratch. Not ideal, but at least we weren’t spending hours pretending the old fiberglass could be salvaged.
Cutting Techniques We Used:
Circular saw – for making large, clean cuts.
Multitool/Fine tool – to carefully isolate the top layer and cut it out without damaging surrounding areas and to cut areas that curved.
Crying
Choosing New Core Materials (aka What We Could Actually Get Our Hands On)
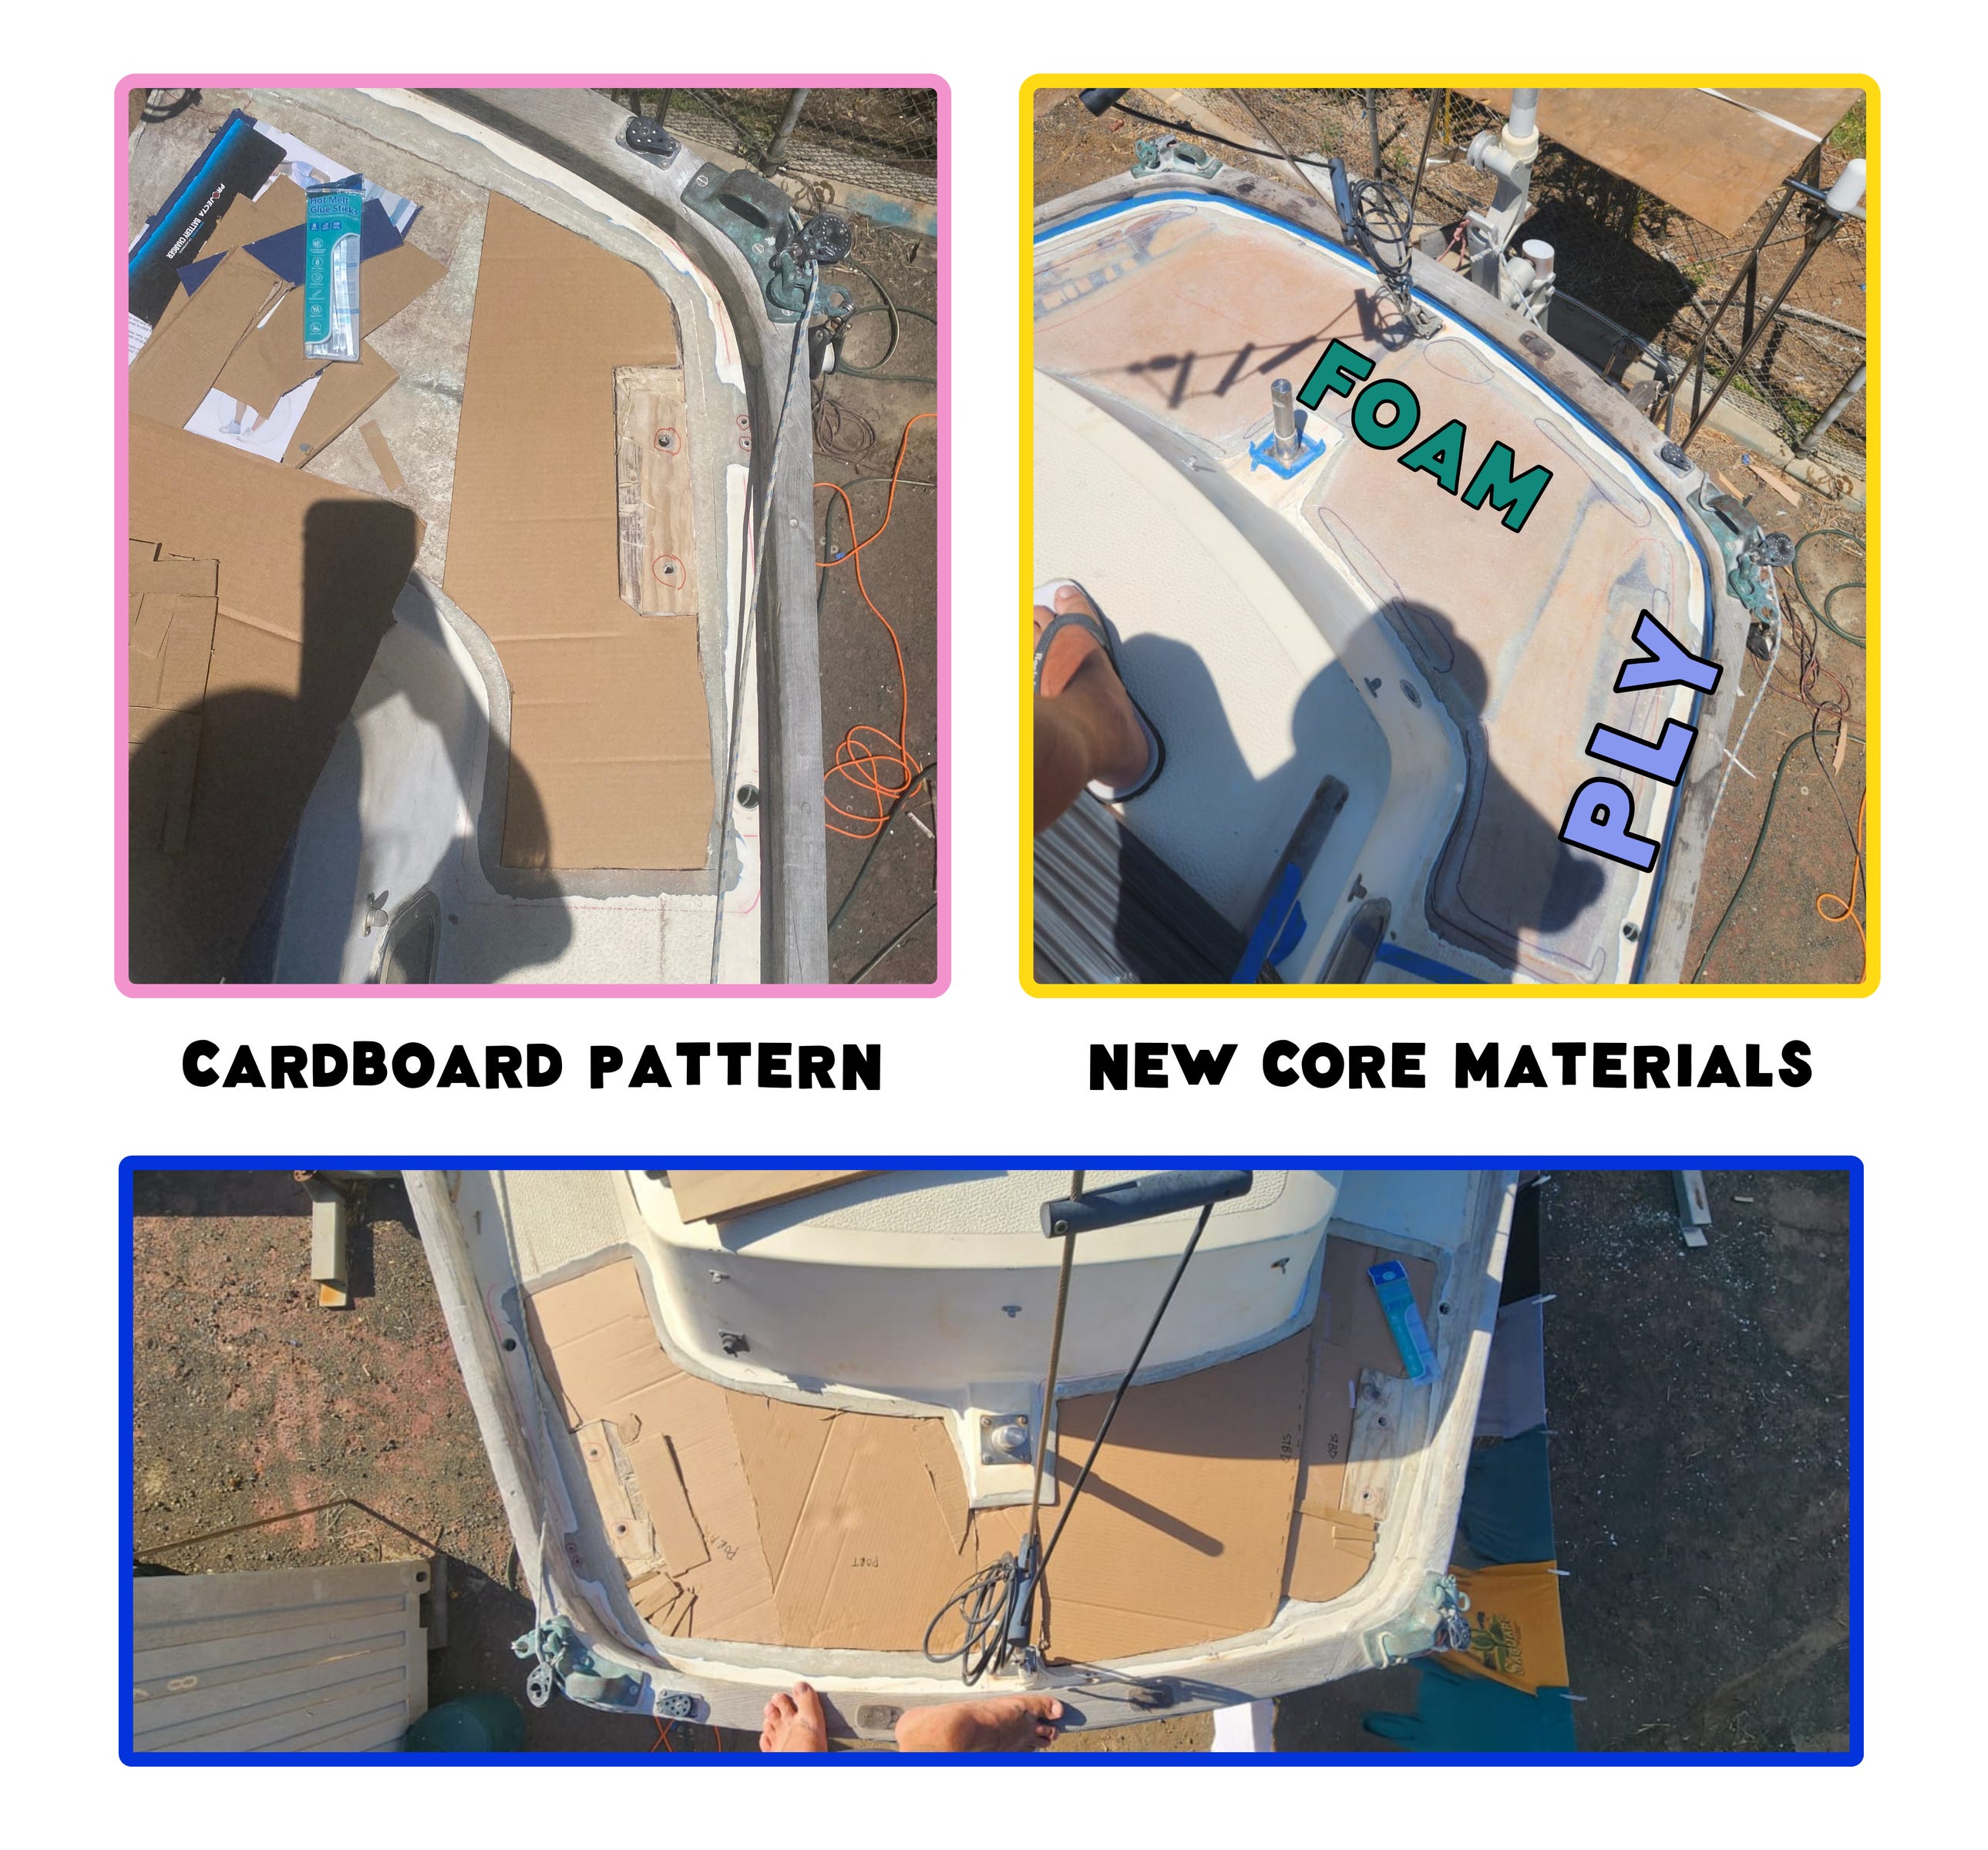
After some YouTube videos and emails to foam manufacturers, we settled on a mix of Divinycell foam and plywood:
Plywood for areas where we needed extra reinforcement (solar arch, cleats, backstay).
Divinycell for everything else since it’s lightweight and won’t rot like balsa

Cutting & Installing the New Core (Featuring Panic and Epoxy Fumes)
We made cardboard templates first using the box the divinacell came in. Once the core pieces were cut, the real fun began:
Prep the fiberglass underlayer – Sanded and cleaned it so the new core would bond properly.
Epoxied everything into place – First a thin wet-out layer on both the fibreglass and core surfaces, then thickened epoxy
Weighted it down – No vacuum bags needed, people! We used sandbags and temporary screws while screwing. (Hot tip - you can use toilet bowl wax to wax up your screws before putting them into the epoxy so they don’t stick 🚽.)
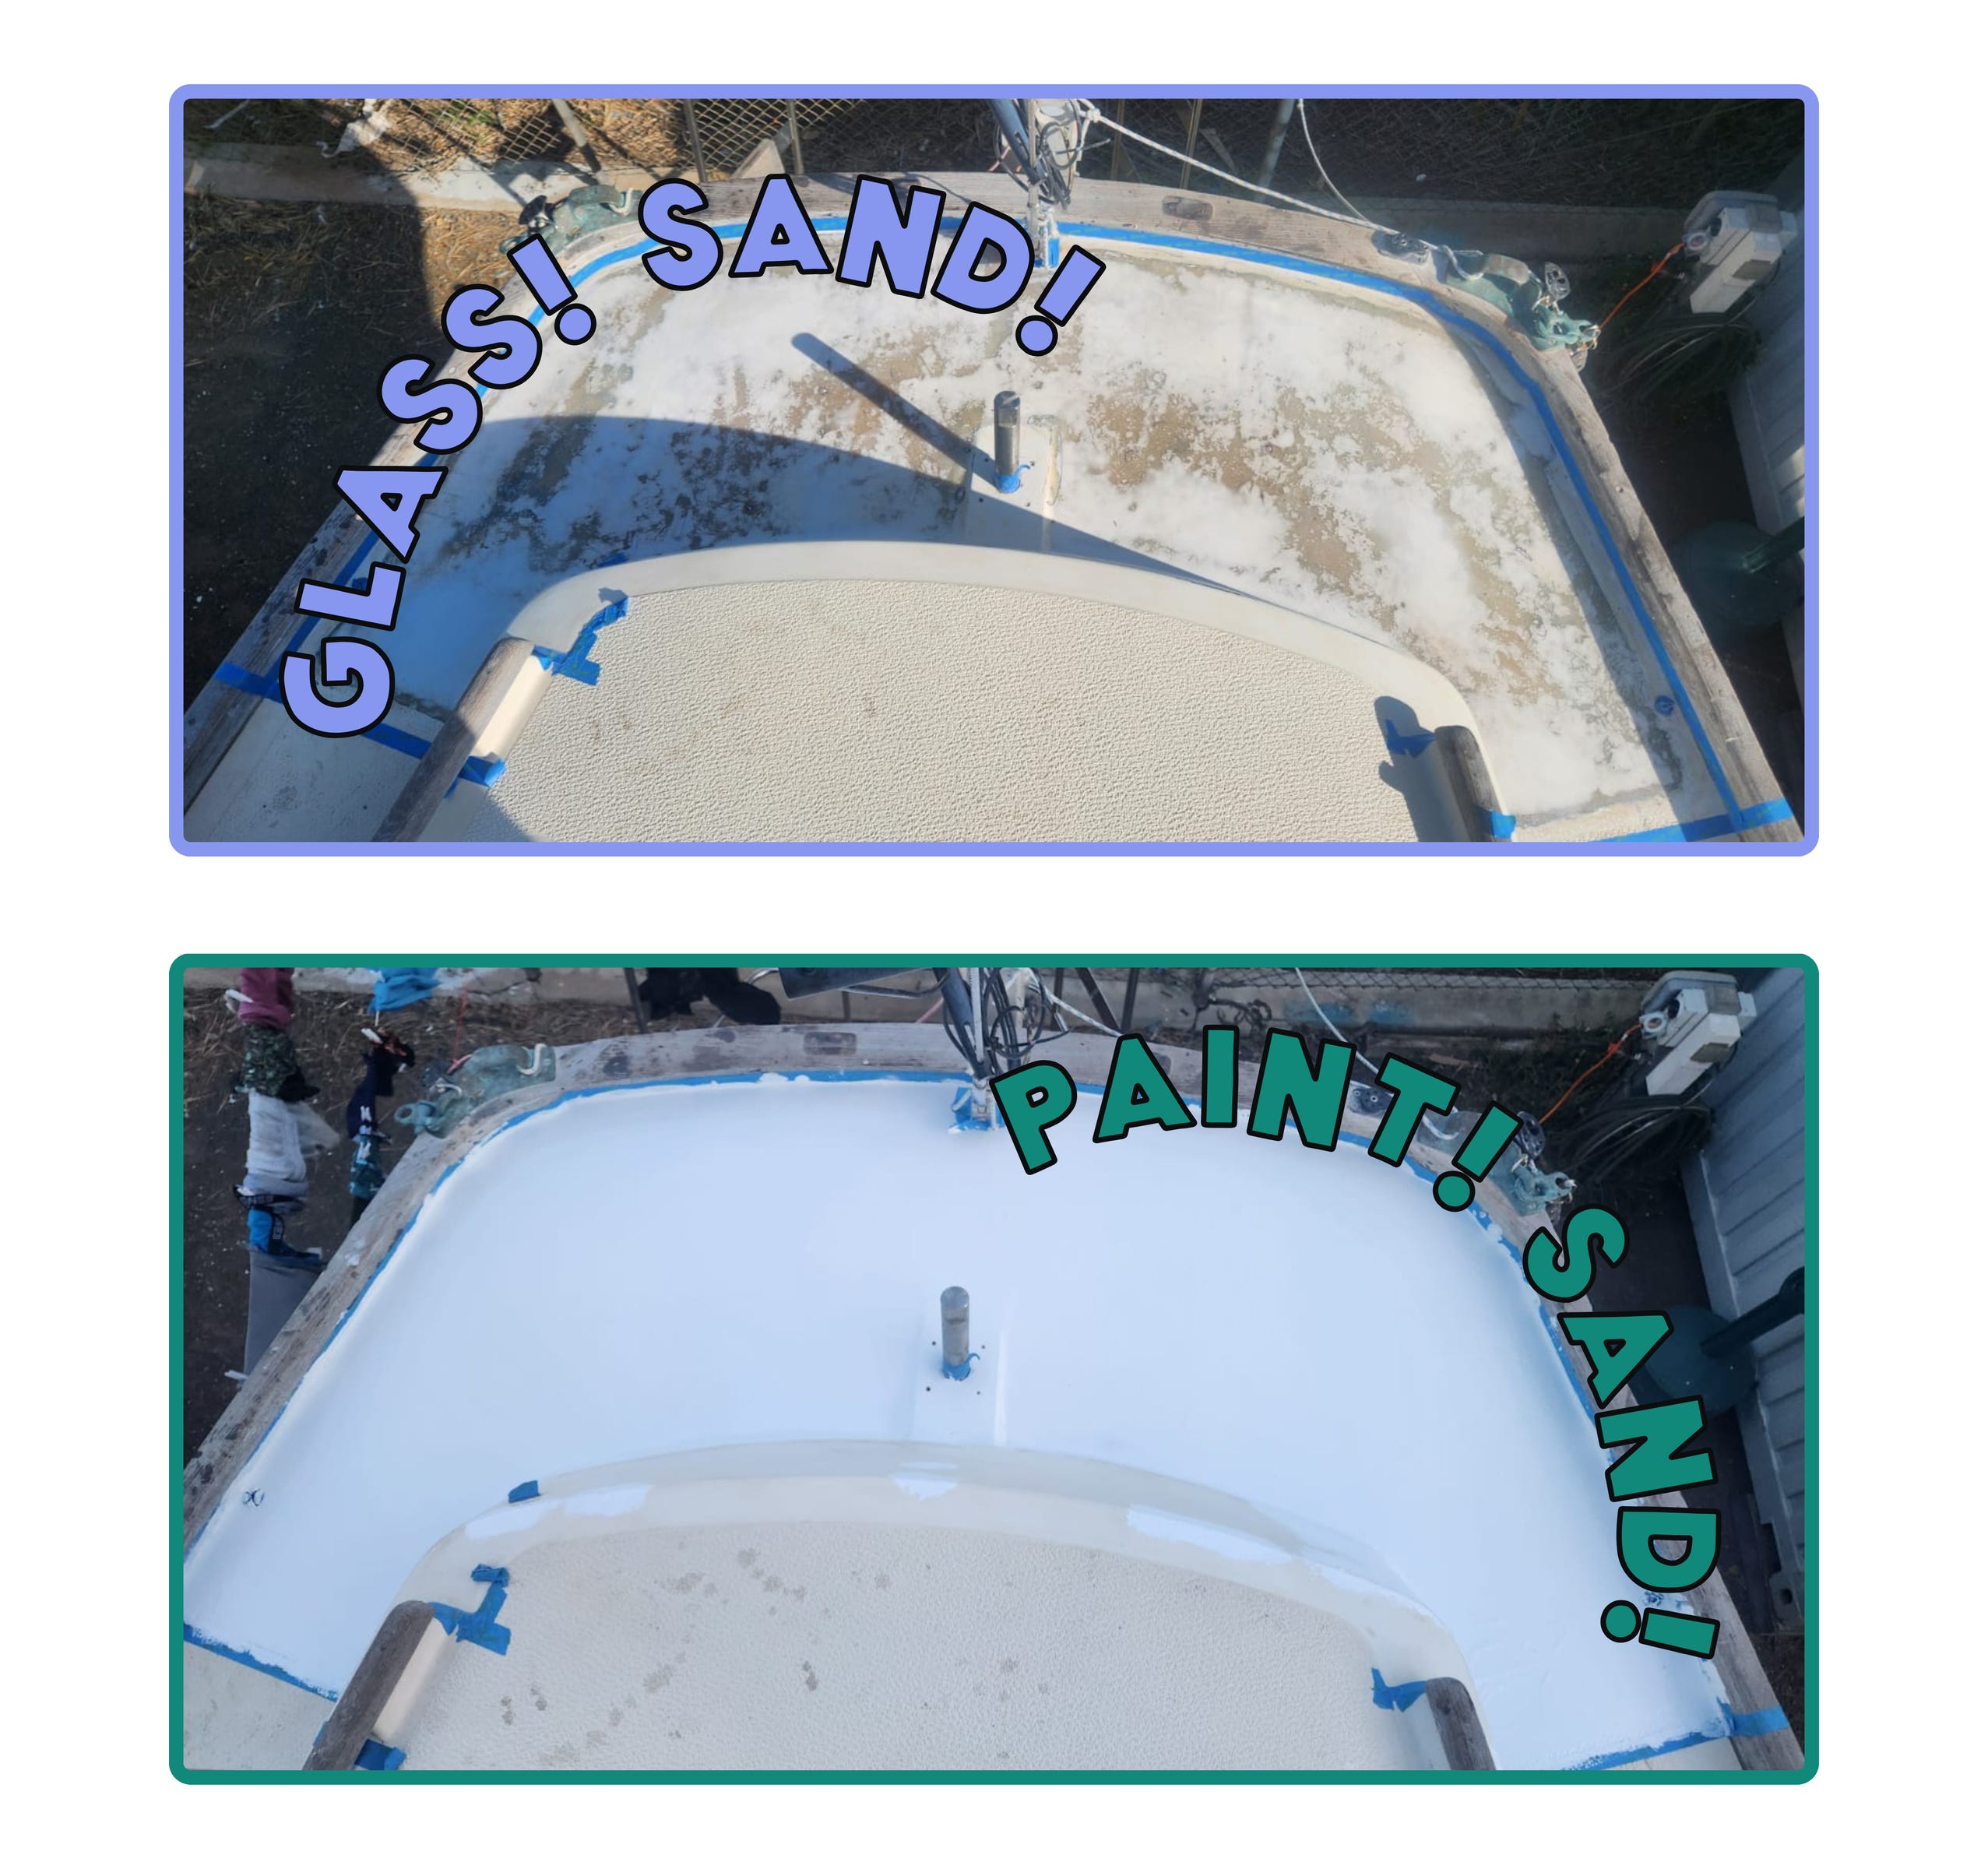
Fiberglassing the Deck (Where We Learned We Hate Gelcoat)
Once the new core was solid, we glassed over it with layers of fiberglass mat and polyester resin. The real challenge? Working with gelcoat in 36°C (97°F) Australian sun. ☀️ 🥵
Lessons learned:
Gelcoat sets FAST in the heat (yeah duh). We mixed in tiny batches to avoid disasters. They still happened, but we tried.
Matching the original color wasn’t something we cared about. We could have tried to mix the colour exactly each time, but didn’t think it would be worth it if we ended up doing the colours wrong and sanding through to make some topographic mess.
Sanding is inevitable. No matter how careful you are, you’ll still end up sanding for days.
We used spray paint and covered all the gel coat so that we could really easily see which areas we needed to sand still. This was annoying because it meant we had to do a really good job… but was also really nice because it meant we had to do a really good job.
Keeping everything (and everyone) cool helps a lot. We used ice packs and worked in the evenings to keep things manageable.
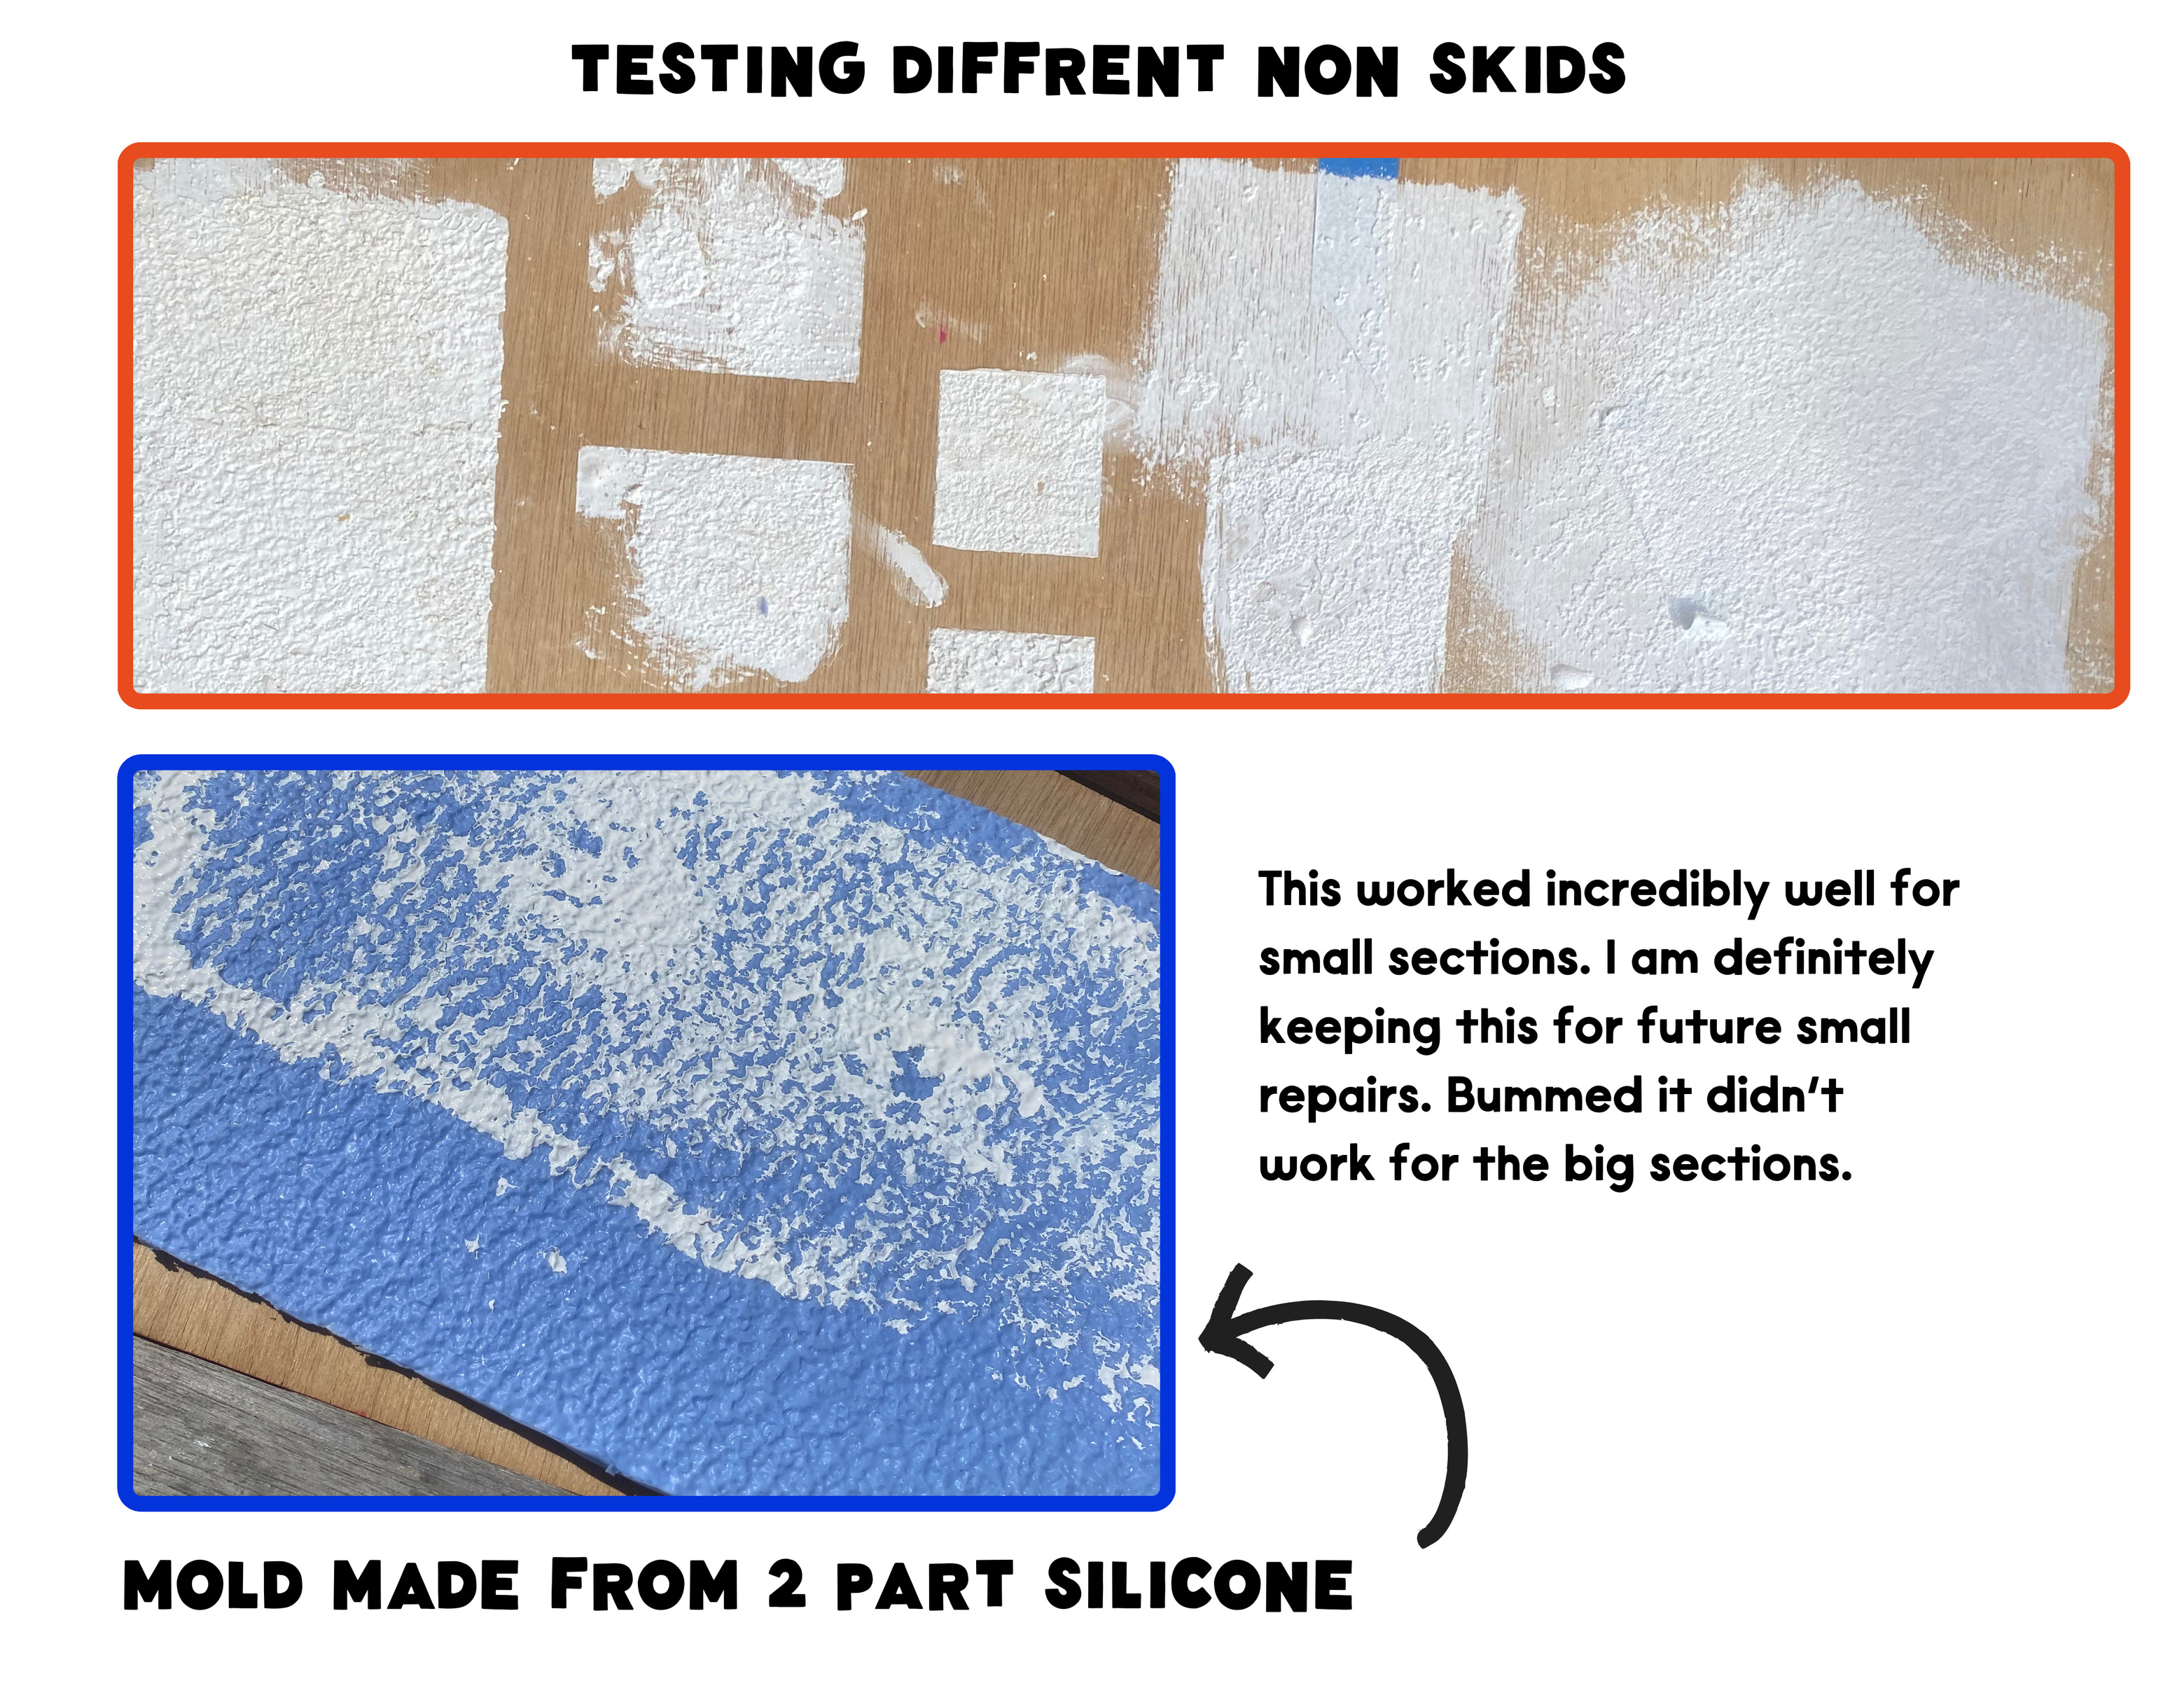
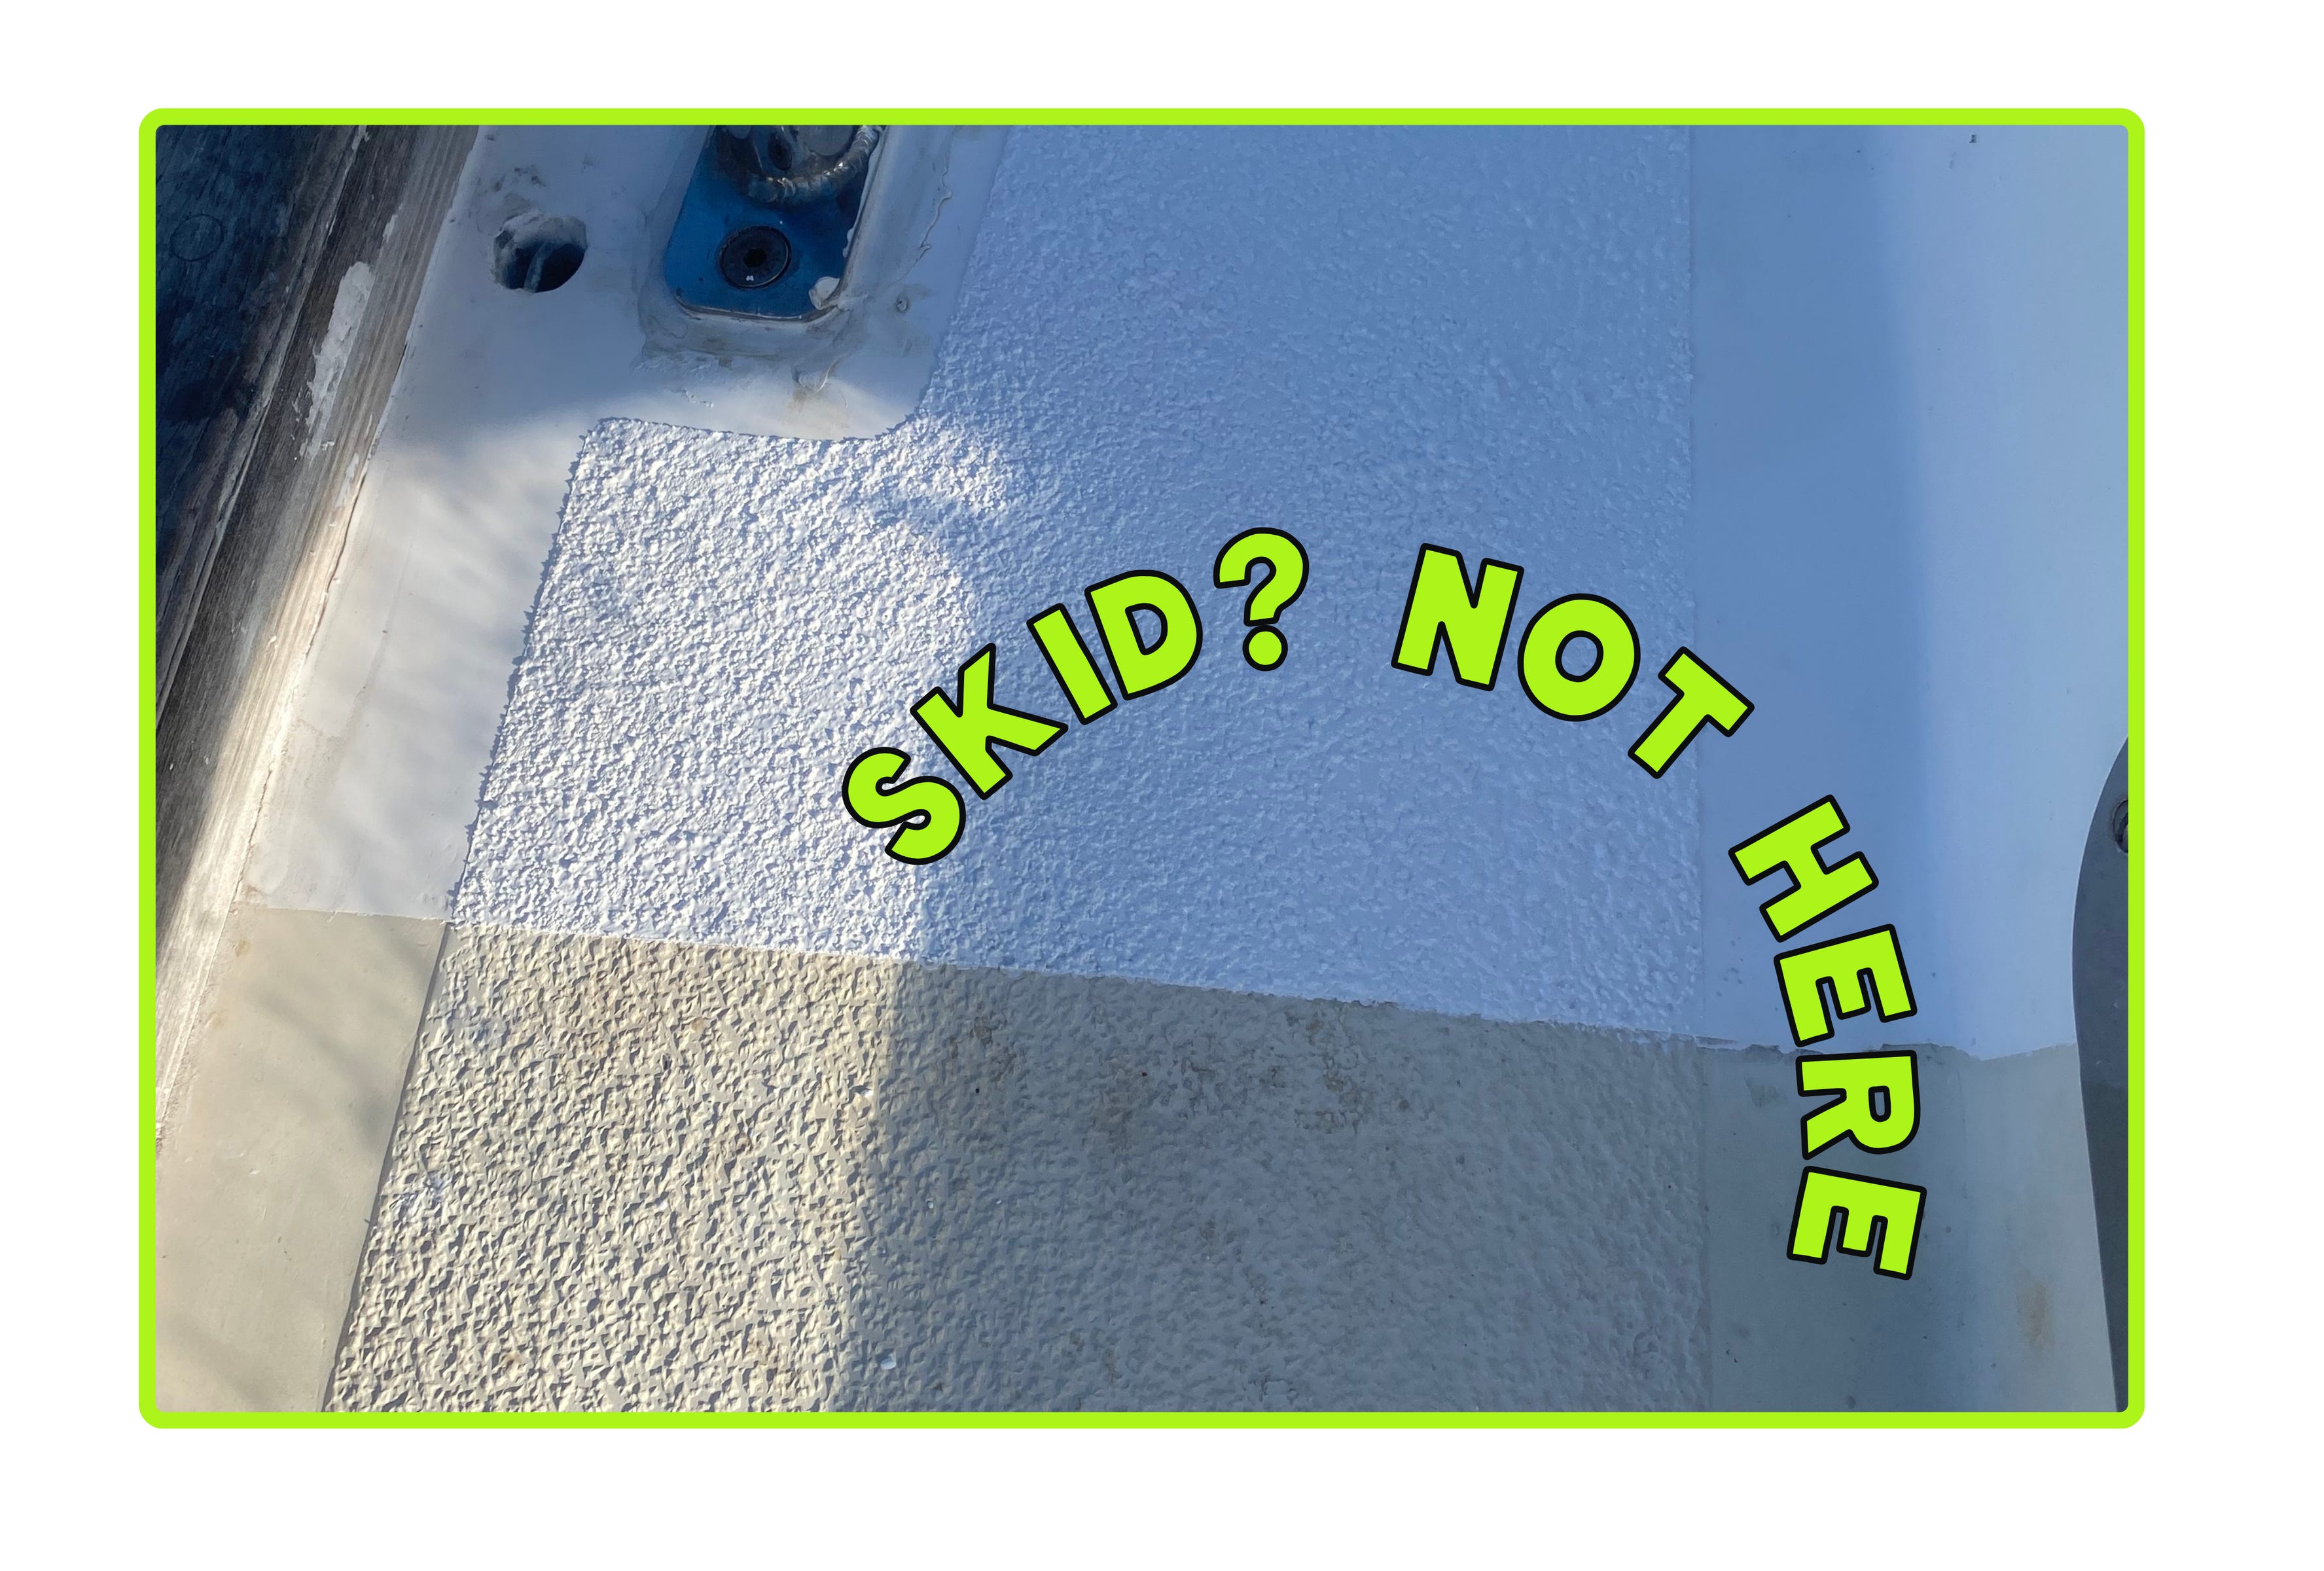
Making a Non-Skid Surface (Trial, Error, and a Lot of Cursing)
Ok this part was actually really fun. We tried several methods before settling on one that didn’t look like a disaster:

In the end, we went with glass beads mixed into gelcoat and applied it with a brush and foam roller. The best results came from first brushing on a layer of beads mixed into gel coat, then rolling over it with a small nap foam roller. The foam roller would pick up extra gel coat where it was heavy, but would leave the beads in place and helped avoid clumps and inconsistencies.
Final Thoughts: What We’d Do Differently and what went well
Using different core materials for different areas was nice. The plywood reinforcement made a huge difference in high-load spots. Plywood is harder to fit and work with, so I’m glad we didn’t go with an entirely plywood core.
Sealing hardware properly is non-negotiable. Learn from our mistakes so you don’t end up here.
Non-skid application takes practice. If your first attempt looks awful, make sure that awful one is a test and not on the deck.
Learning how to use gel coat from YouTube videos can be pretty tricky, but is technically possible.
The gel coat took us a hot while. We would have saved a lot of time if we would have been able to salvage the top layer of fibreglass (and we would have had a lot less fibreglass dust in our cushions…and hair, and lungs, and socks)
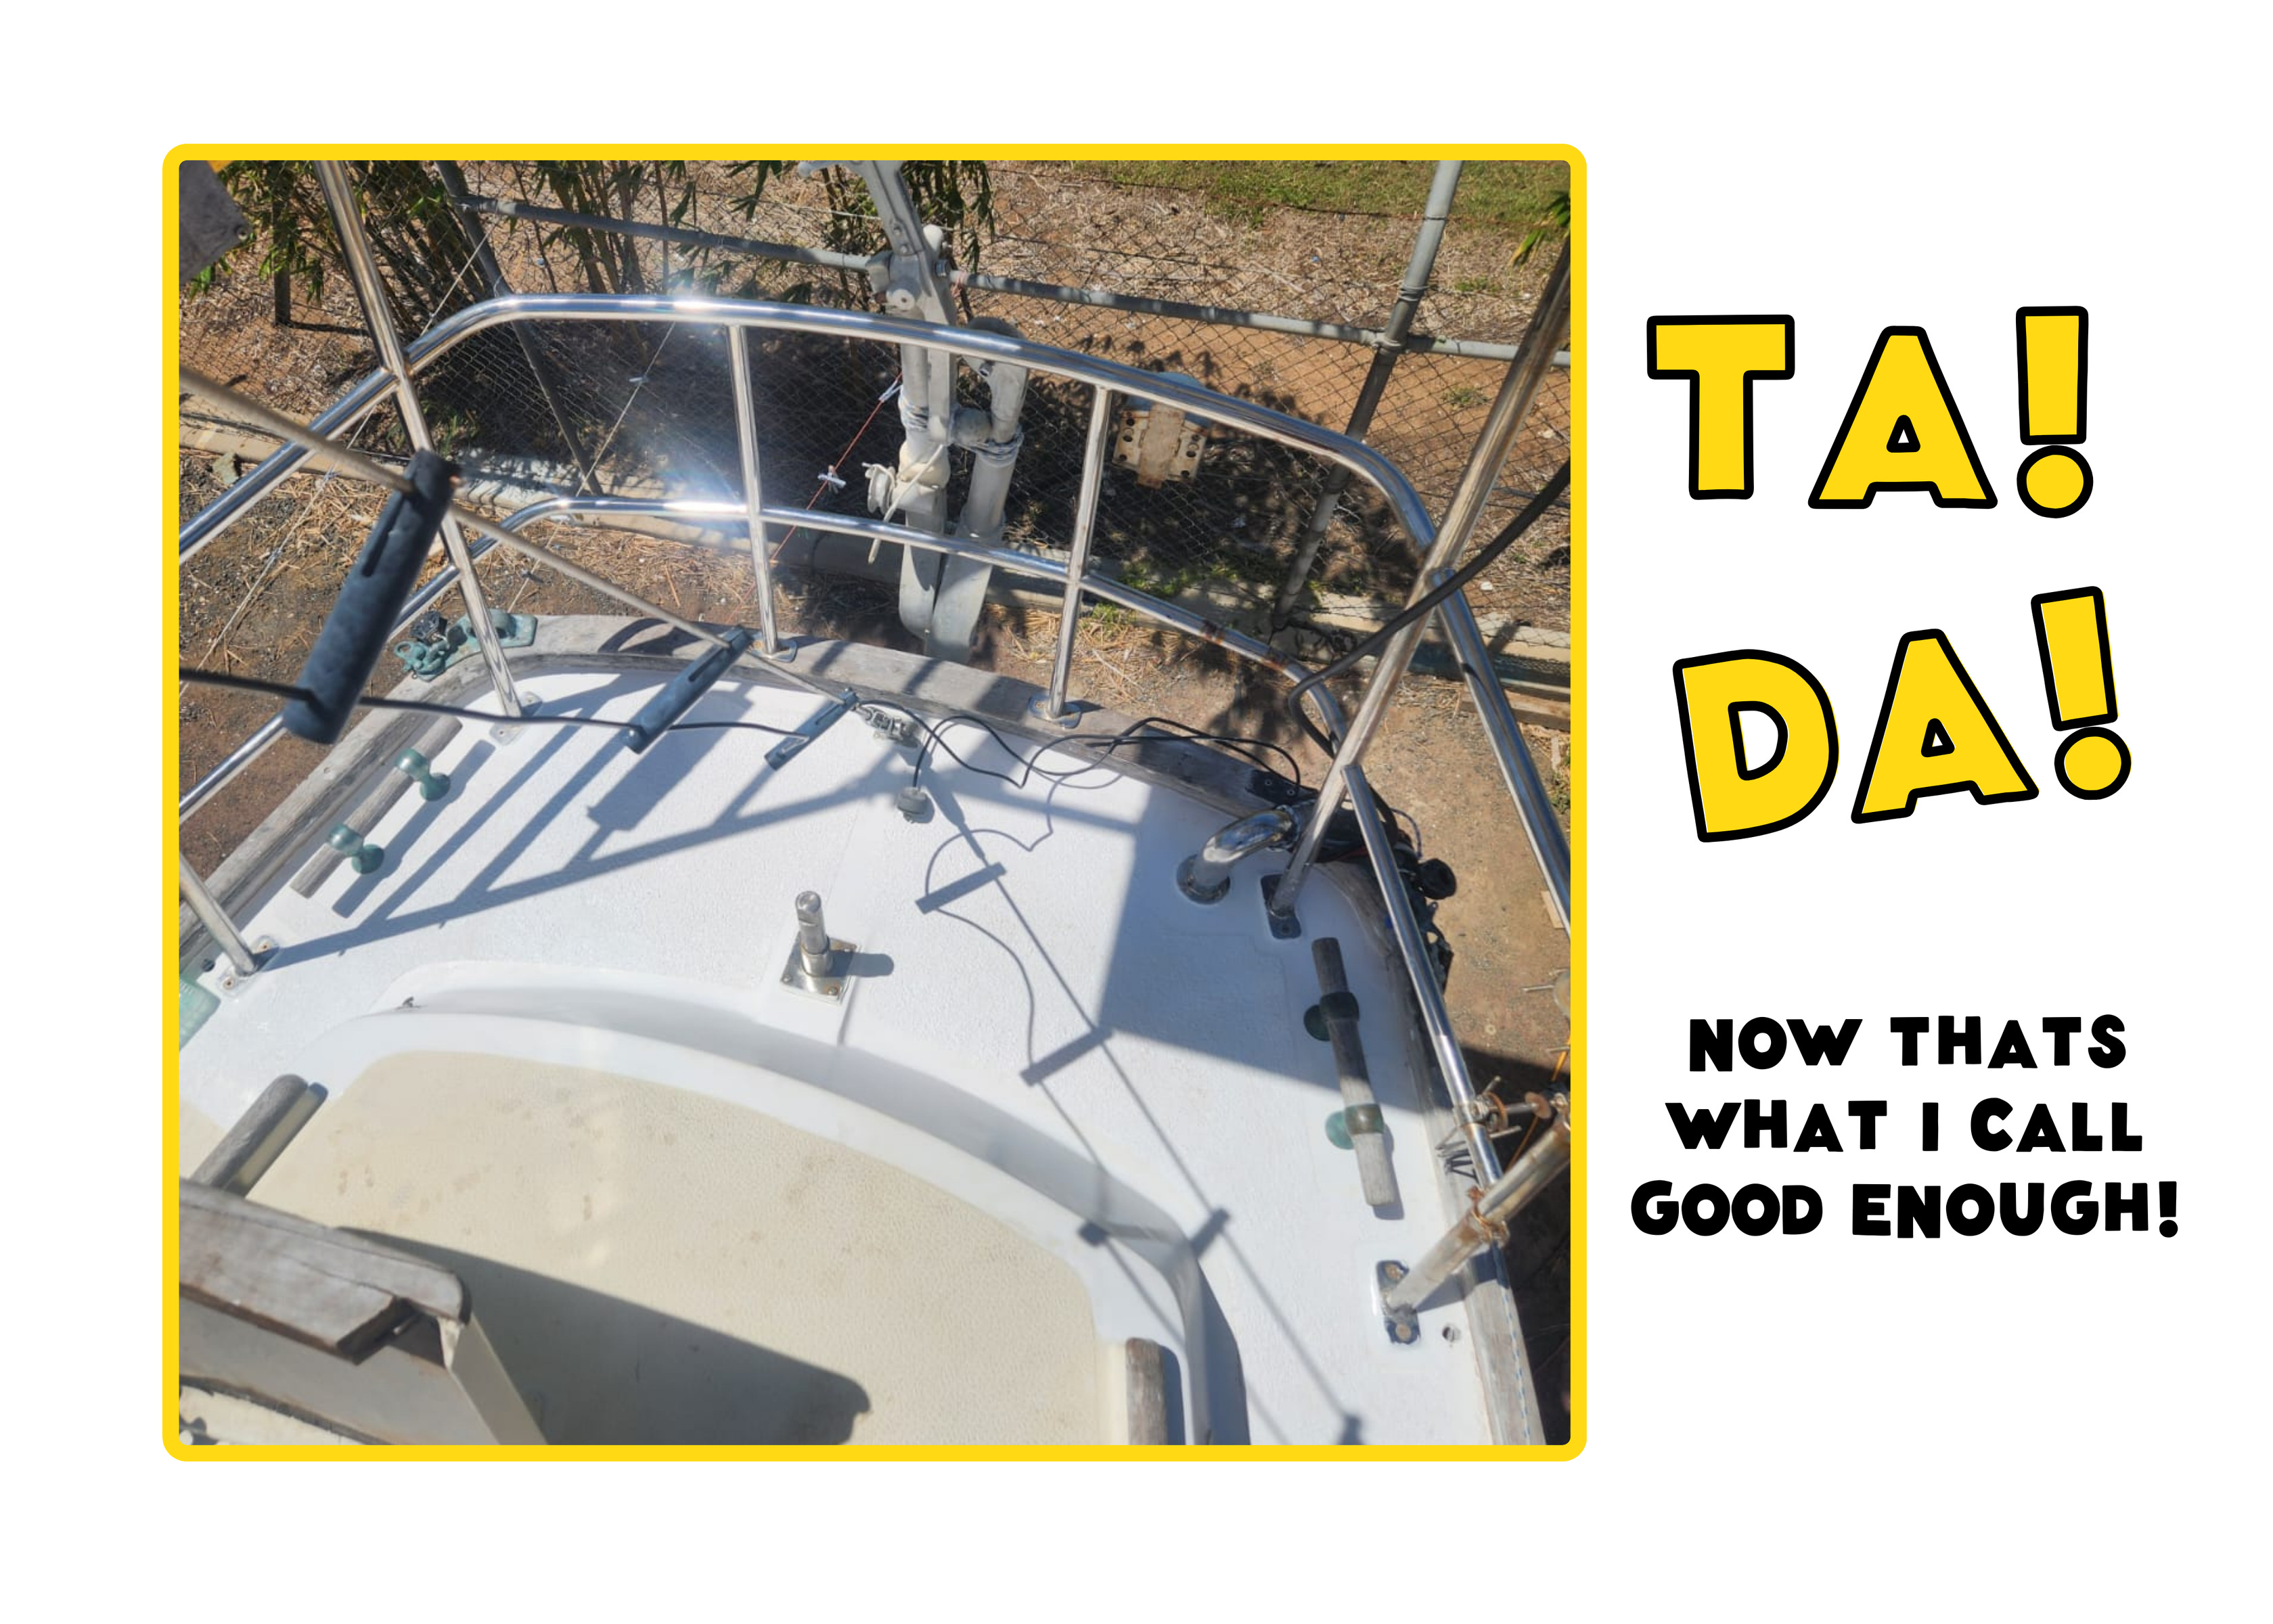
There you have it! We managed to replace some core and it only took a month longer than we thought it would.